
I’d been trying to find this information for months. At best, I couldn’t find anything. At worst, Wild Apricot’s help docs just laughed at me. Seriously, I wish I’d taken a screenshot, but it was a blank page with a broken image icon in the center. :-\
So here’s a quick overview of how to add the needed code.
First Things First
I’m sure there are other ways to do this, but I’m using Google Tag Manager (GTM) to get the GA4 code into the website because it’s the method I’m most comfortable with. The upside to using GTM is that it’ll be easy to add custom events (tags) to the website to track All the Things later, or if you have a ton of custom events in UA that need to be ported to GA4.
If you know, you know.
Requirements/what you need
- A GA4 Measurement ID ready-to-go: this is documented elsewhere. At minimum, you need Admin access to the old GA (UA) account to create the GA4 ID
- A Google Tag Manager container: outside the scope of this quickie. Again, this is well-documented elsewhere
- Admin access to the Wild Apricot website in question 😉
Ready the GTM Codes
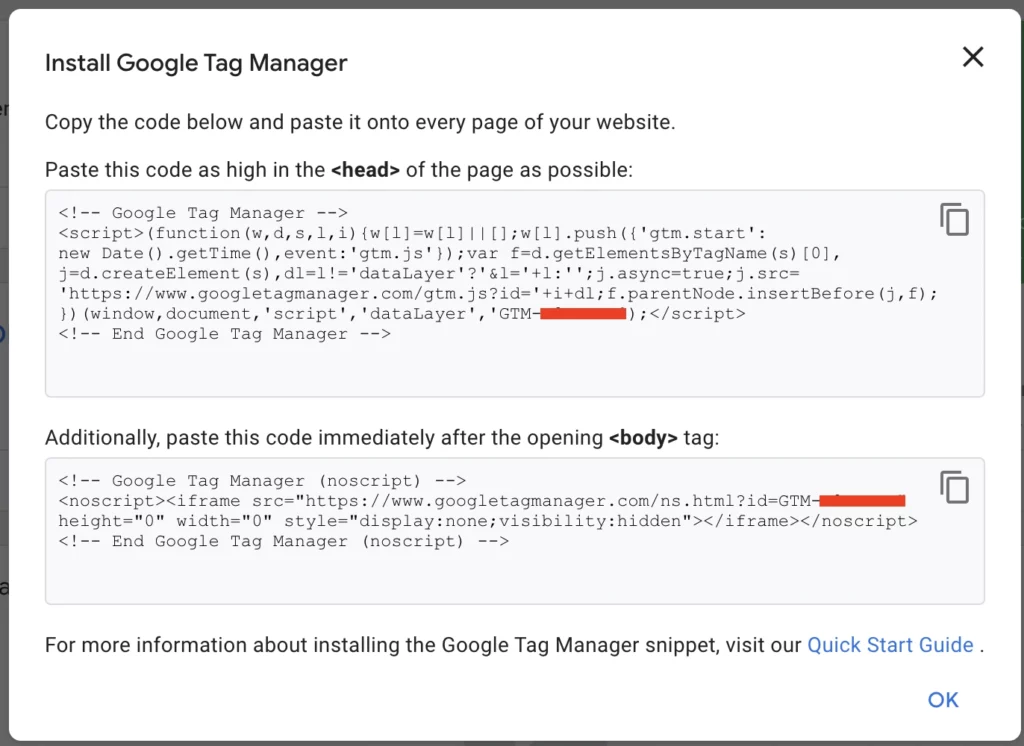
When you set up your GTM container, you are presented with a popup that shows the code you need to insert into the <head> and <body> of the website…
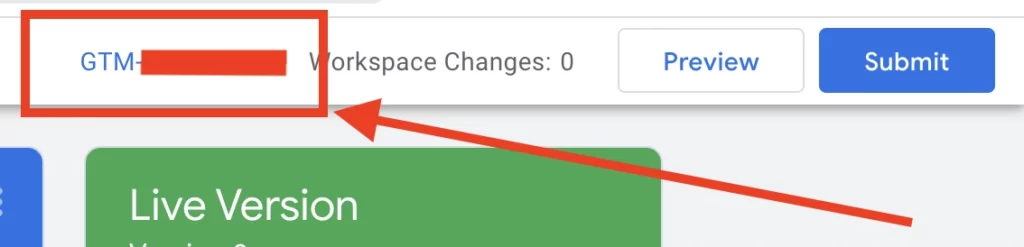
If you missed it the first time, you can find it again via Admin > Container > Install Google Tag Manager or by clicking the GTM-XXXXXXX link in the Workspace info bar just to the left of the Preview button…
Copy the <head> tag, and keep this open in another tab or window.
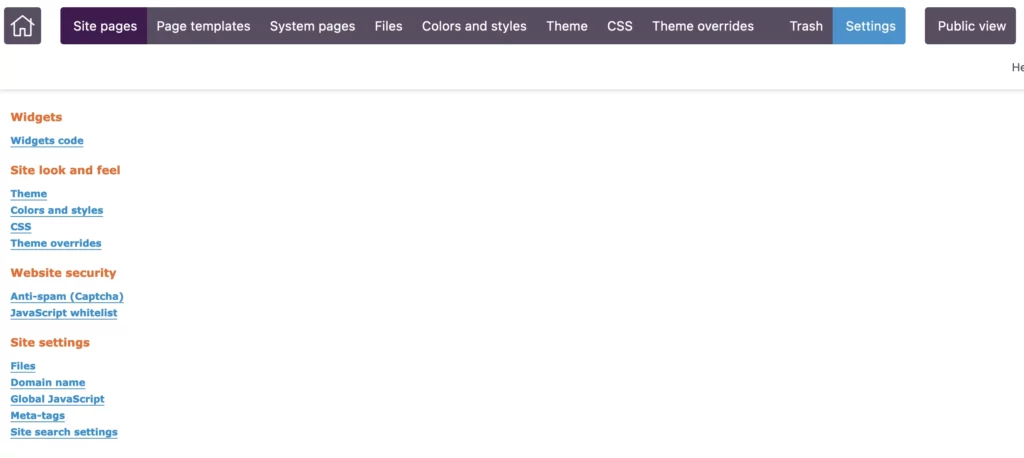
Log into the Wild Apricot Admin
Open a new tab and log into the Wild Apricot admin area. Once you’re in, navigate to the Settings screen…
Insert the <head> code into Meta-tags
Go to Meta-tags > Raw Headers and paste the code above anything that may already be there…
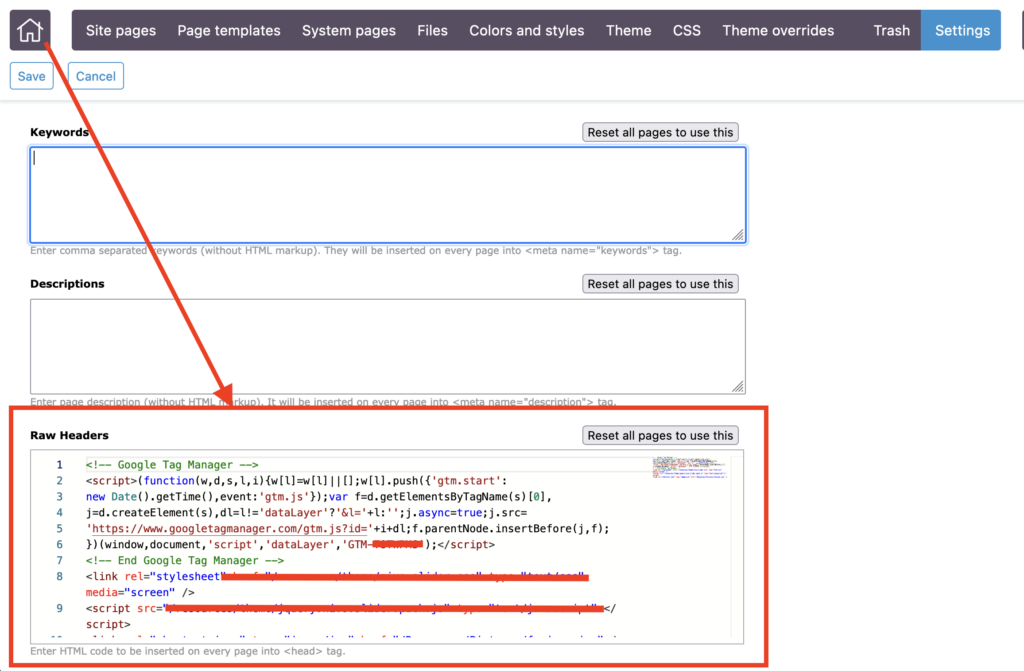
Click the Reset all pages to use this button to apply the code everywhere.
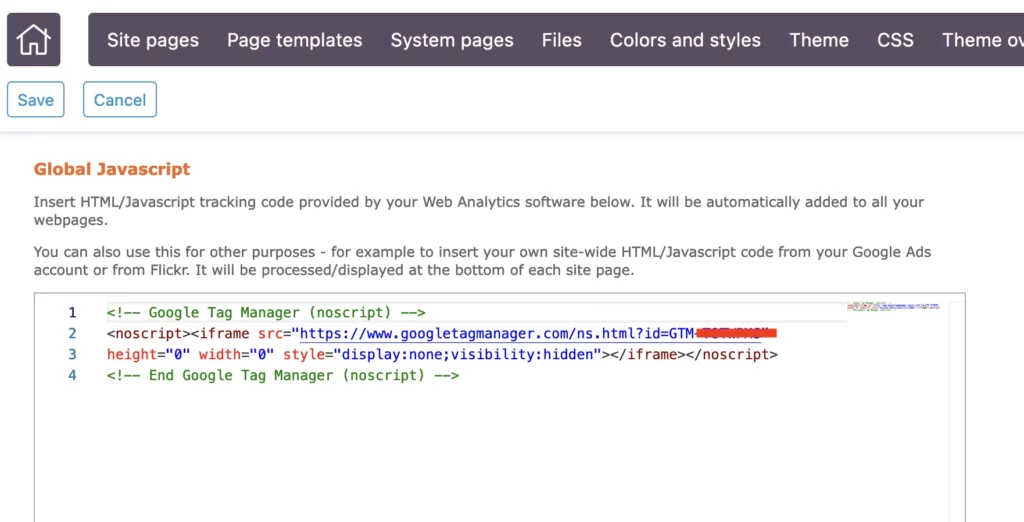
Copy the <body> code into Global Javascript
Go back to the tab with the GTM popup and copy the <body> code. On the Wild Apricot tab, navigate to Settings > Global Javascript and paste the code there…
Finish the GA4 Setup
With the GTM code inserted into the Wild Apricot site, you’re ready to finish the GA4 setup. Back in GTM, you can now create a GA4 configuration tag to hold the Measurement ID. If you’re reading this before July 2023, you’ll probably want to create a UA config tag while at it.
Use GTM’s Preview function to ensure both tags are firing correctly, and if you had the UA code manually set on the Global Javascript screen, feel free to remove it and use GTM’s Preview to re-check that the UA code is still firing.